How to Fix a Sagging Fence Gate
Tired of dealing with a sagging fence gate that just won't stay in place? Discover a fence solution that will have your fence gate looking and functioning great!
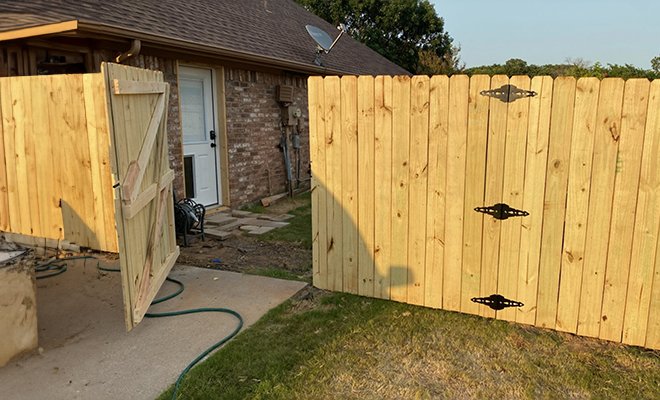
A sagging fence gate is more than just a bothersome obstacle; it’s often an unfortunate sign of a neglected yard. This issue is common and unsightly, but also poses potential security risks, exposing your home to unwanted intruders. But fear not! With little DIY effort, fixing a sagging fence gate doesn't require a professional carpenter or costly repairs. You're just about to embark on an engaging journey that will transform you into the unofficial neighborhood handyman or handywoman. In this article, we'll walk you through easy-to-follow steps to fix a sagging fence gate and prevent future drooping so you can say goodbye to unnecessary delays and hello unimpeded entryways.
Identifying why your fence gate is sagging is critical when fixing it. When your fence gate starts to sag, it's often a sign of underlying issues that need your attention. Understanding what causes the sag is the first step toward a sturdy and reliable fix.
Often, a sagging gate is due to leaning or unstable fence posts. Inspect the posts closely. Are they standing straight? Is there any sign of rot at the base or looseness in the soil? Sometimes, reinforcing or replacing a weakened gate post is all it takes to bring your gate back to level.
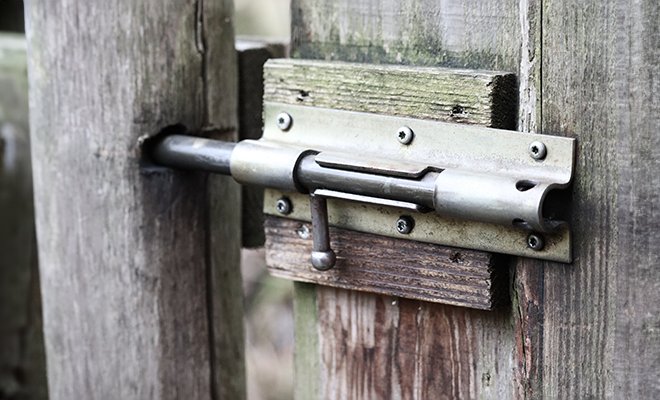
Over time, the hardware holding the weight of the gate can wear out or come loose. Check the clamps, old hinges, and hinge screws, for any signs of rust or damage. Make sure all screws and bolts are tight and in good condition. Replacing old, worn-out hardware can make a big difference.
Sometimes, the gate itself might be the problem. Wood gates usually warp or rot as time passes and metal gates might bend. And sometimes, the connection between the fence gate and the gate frame might loosen over time. Give your gate a thorough inspection for any signs of damage or wear.
By understanding the exact issue(s) with your sagging gate, you can be better prepared to choose the right solution and ensure your gate can stand strong for years to come after you fix it.

Repairing a sagging fence gate is a DIY home improvement project that most homeowners can tackle over a weekend. And if you are thinking of taking up this gate repair project, you'll need to gather the right tools and materials before you start.
We've curated an online storefront with all of the supplies you may need for this DIY project in one place. Just click the link below to shop!
.jpeg)
Here's a list of what you'll typically require:
You can also have a steel cable or anti-sag gate kit which is a combination of various tools and materials. Remember, the right tools and materials will not only make the job easier but also ensure a more durable and lasting repair. Always prioritize quality, especially for outdoor projects exposed to the elements. With everything gathered, you'll be ready to tackle that sagging gate and restore it to its rightful position.
To repair your sagging fence gate effectively, follow this comprehensive step-by-step guide. This process involves assessing the gate, making necessary adjustments to the fence post, and ensuring everything is properly aligned for a functional and aesthetically pleasing gate.
The first step to fixing a sagging fence gate is to thoroughly assess the current condition of the gate. Begin by examining the hinges and latches for any signs of wear, rust, or damage. Check if the gate is misaligned or leaning to one side, as this can indicate problems with the posts or foundation.
Furthermore, carefully inspect the overall structure of the gate and look for any loose or broken pieces. Take note of any underlying issues such as rotting wood or weakening metal components that may be contributing to the sagging. By diligently assessing these key areas, you'll gain a comprehensive understanding of what needs to be fixed to effectively restore your fence gate's stability and functionality.
Now that you've secured the gate, it's time to tackle the next step in fixing your sagging fence gate: removing the gate itself. Start by unscrewing the hinges from the post using a screwdriver or drill. It's important to have someone assist you with this process to avoid any accidents or damage to yourself or the gate. Once the hinges are removed, carefully lift the gate off its position and set it aside. As you remove the gate, continue to take note of any damage or wear and tear that may have contributed to its sagging. This will help inform your repairs in later steps. Remember to keep track of all screws and hardware during removal so they can be easily reattached during reinstallation.
Once you've identified the cause of your sagging fence gate, and if you see that the post is the issue, it's time to address it. Start by digging out the area around the base of the post to expose it completely. Use a level to check if the post is plumb and make adjustments as needed by adding braces or shims to straighten it. Next, re-secure the post by pouring new concrete around it for added stability. Make sure that the post is perfectly upright before letting the concrete set. Finally, consider reinforcing the post with metal brackets or supports for long-term durability. This will provide additional support and help prevent future sagging issues, ensuring your fence gate remains sturdy and functional for years to come. If the fence post is rotted or damaged, remove and replace it with a new one while following the same procedure as above.
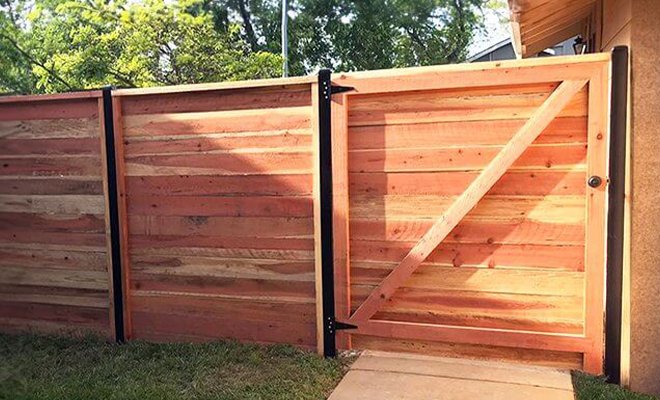
Once the post is secure, lay the gate on a flat surface to address any sagging. A sagging wooden gate often needs realignment to function properly. Begin by laying the gate flat on an even surface. If it is a double gate, repeat the same process separately. Measure diagonally from each set of opposing corners. If these measurements aren't equal, the gate is out of square. To make sure that the gate is square, attach a ratchet strap or turnbuckle diagonally across the gate, connecting the top hinge corner to the bottom latch corner. Gradually tighten the strap or turnbuckle, pulling the longer diagonal in to match the shorter one. This process will realign the gate, ensuring it hangs correctly and swings smoothly without sagging or dragging.
Once the gate is square, re-attach it to the privacy fence carefully. Start from the hinge side of the gate. Attach the gate hinges to the post, ensuring they're tight and well-aligned. As you reattach the gate, make sure that it's level and not dragging on the ground. Once the gate is in place, open and close the gate to observe its movement. It should swing smoothly without resistance. If it doesn't, adjust the hinges and check the post alignment. A well-hung wooden fence gate closes snugly and swings easily, enhancing both the security and aesthetic appeal of your fence.
Once the fence gate is reattached, conduct a careful inspection. Open and close the fence gate several times, while looking at its motion and alignment. Additional tweaks may be needed if you notice that the fence gate still sags or drags. Adjust the tension in the turnbuckle or the ratchet strap if used. Also, don’t forget to double-check the hinges and posts for stability. Look at the fence gate from different angles to ensure it's visually aligned with the whole fence line. This final step is about perfecting the details, ensuring the gate not only functions well but also looks seamlessly integrated with the rest of the fence.
By following the above steps, you'll handle the common issues that lead to a sagging fence gate and ensure a sturdy, reliable fence gate for your home. Always take safety precautions and consider consulting a professional contractor if the fence repair is beyond your comfort or skill level.
To make sure that your fence gate remains sturdy and functional after repairing it, it's crucial to regularly maintain it. Here's a basic maintenance checklist to help you keep your fence gate in top shape:
Monthly Checks:
Semi-Annual Tasks:
Annual Maintenance:
If you think it might be time for an entirely new fence gate, you can browse different wood fence gate styles for inspiration. You can also learn more about fence gate costs in our comprehensive guide.
Fixing a sagging fence gate is one such DIY project that enhances both the functionality and aesthetic of your fence. By understanding the gate issue, making necessary fence repairs, and following a regular maintenance schedule, you can easily ensure a long-standing fence. While embarking on a sagging fence gate DIY project is doable, you might need a professional touch sometimes. This is where Ergeon can help you. With expertise in fence repair and installation, we can ensure your gate is fixed within no time. Contact us to know more.

 Fence Maintenance and Repair
 Fence Maintenance and Repair
 Fence Maintenance and Repair